 Français (France)
  Finnish (FI)
  English (United Kingdom)


 |
 |
 |
 |
Select your language
Select your language

| |
|
|
|
 |
Follow the Discoverit.fi LinkedIn company page and get special benefits. |
| Subscribe to 'A Hitchhiker's Blog of PM' newsletter | |
Please note that MonteCrystal plan is required for exporting an XML file.
First open project list by selecting 'Projects' from the 'Projects' main menu. To select the project click on the project name link. The 'Export XML' button is located in the project display between the 'Copy project' and 'Create task' buttons (picture 1). The file will then appear in the browser download window. Picture 2 shows an example of an exported XML file.

Picture 1. 'Export XML' button is in the project display.
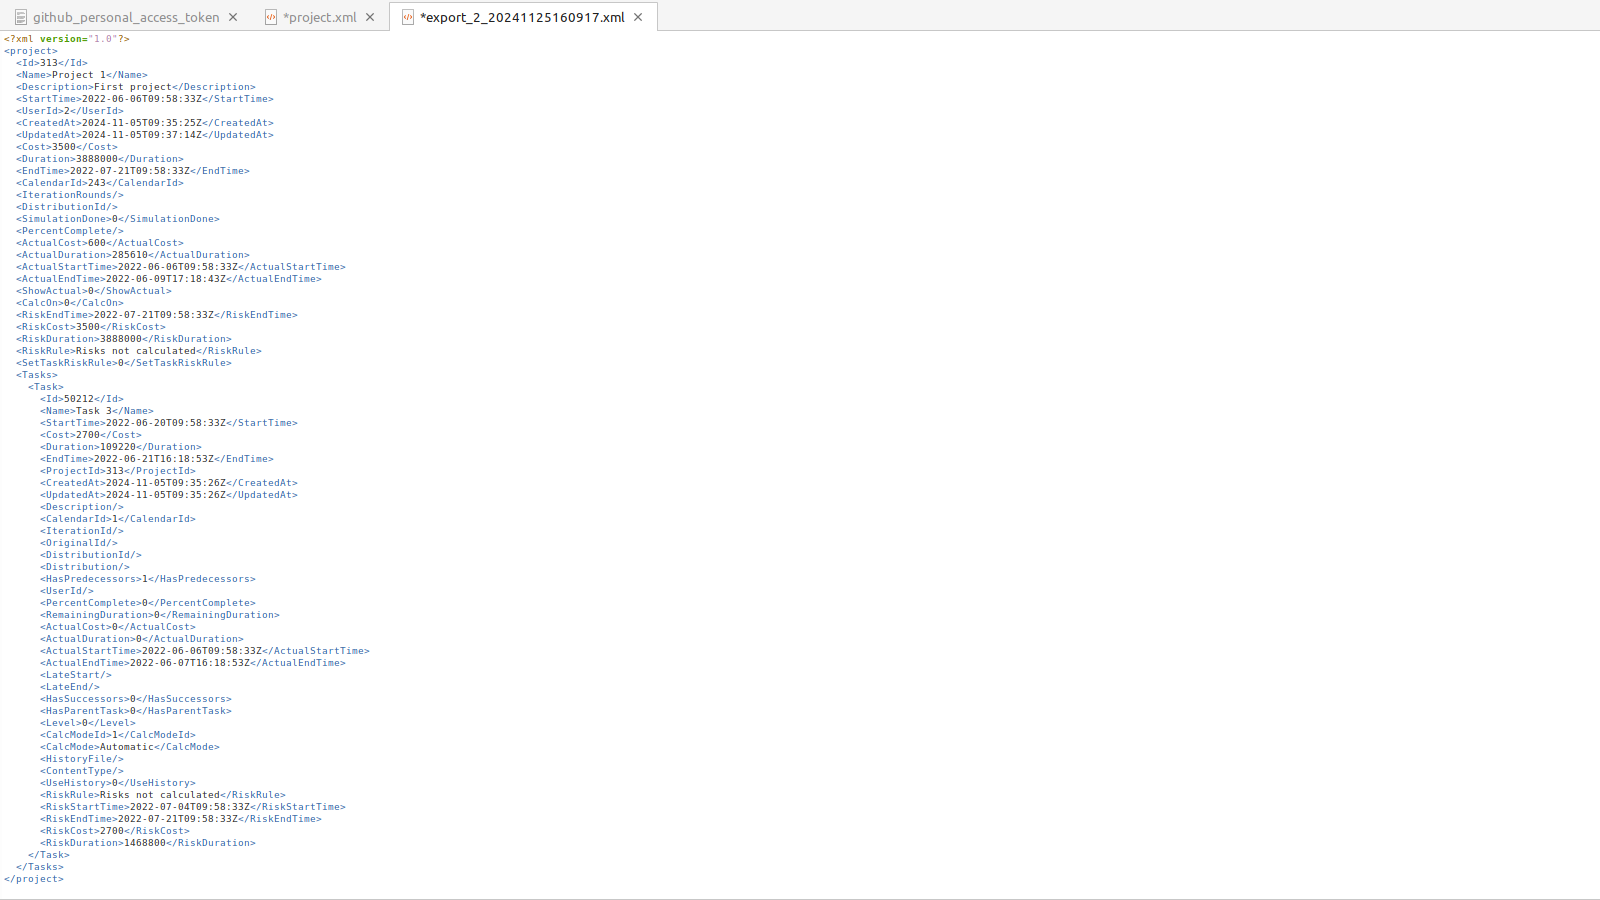
Picture 2. An example of an exported XML file.
Please note that MonteCrystal plan is required for importing an XML file.
To import an XML file of a chosen project ,e.g. one exported from Microsoft Project (example in picture 1), select 'Import XML' from the 'Projects' menu (picture 2). This will open a file selection view (picture 3).
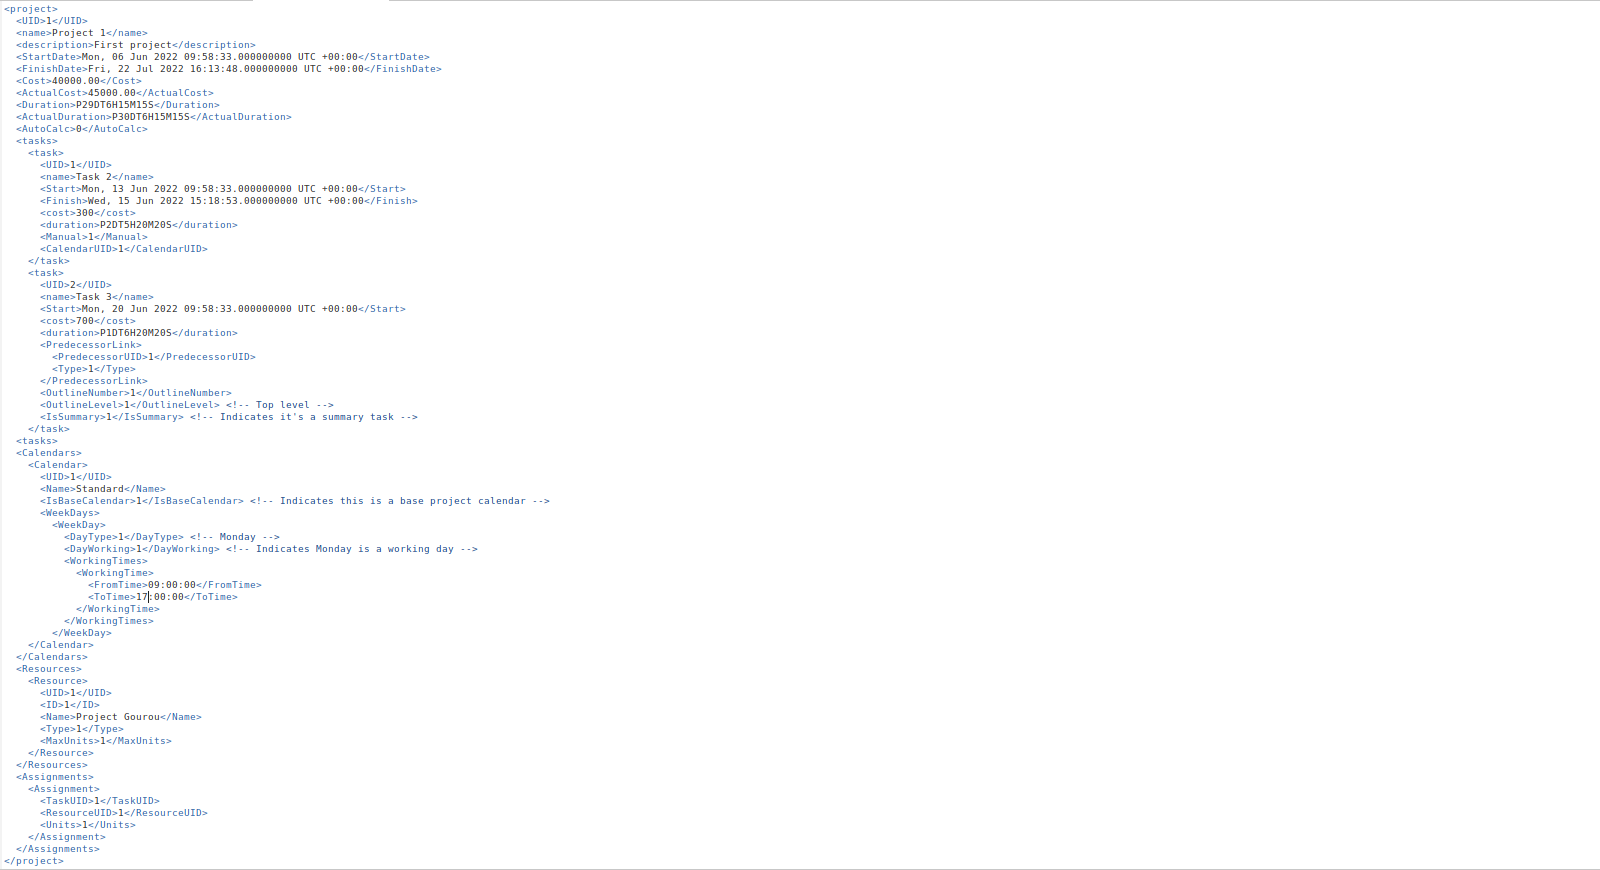
Picture 1. Example of an XML file to import.

Picture 2. 'Projects' view with 'Import XML' item.

Picture 3. XML file selection.
After file selection a view will open where you can attach the XML file fields to the selected MonteCarloProject models (such as 'Project', 'Task', 'Resource', 'Calendar'), see picture 4. Scroll down and press the 'Save' button at the bottom of the page to proceed.
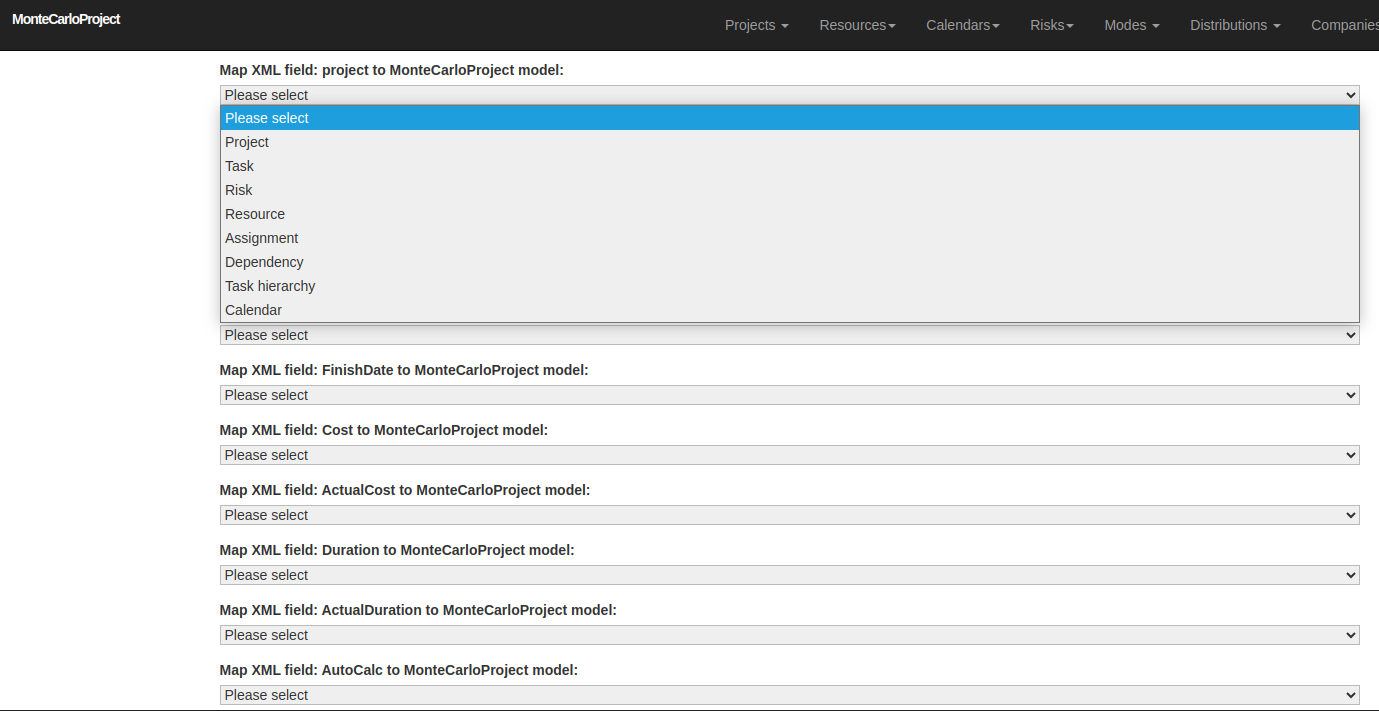
Picture 4. Attachment of the XML fields to the selected MonteCarloProject models.
After the model attachments you can proceed by attaching the XML fields to the MonteCarloProject model fields, or attributes, on the next screen (picture 5). Scroll down the page again and finally press the 'Save' button at the bottom of the page. You will then receive a notification that the XML file has been imported.
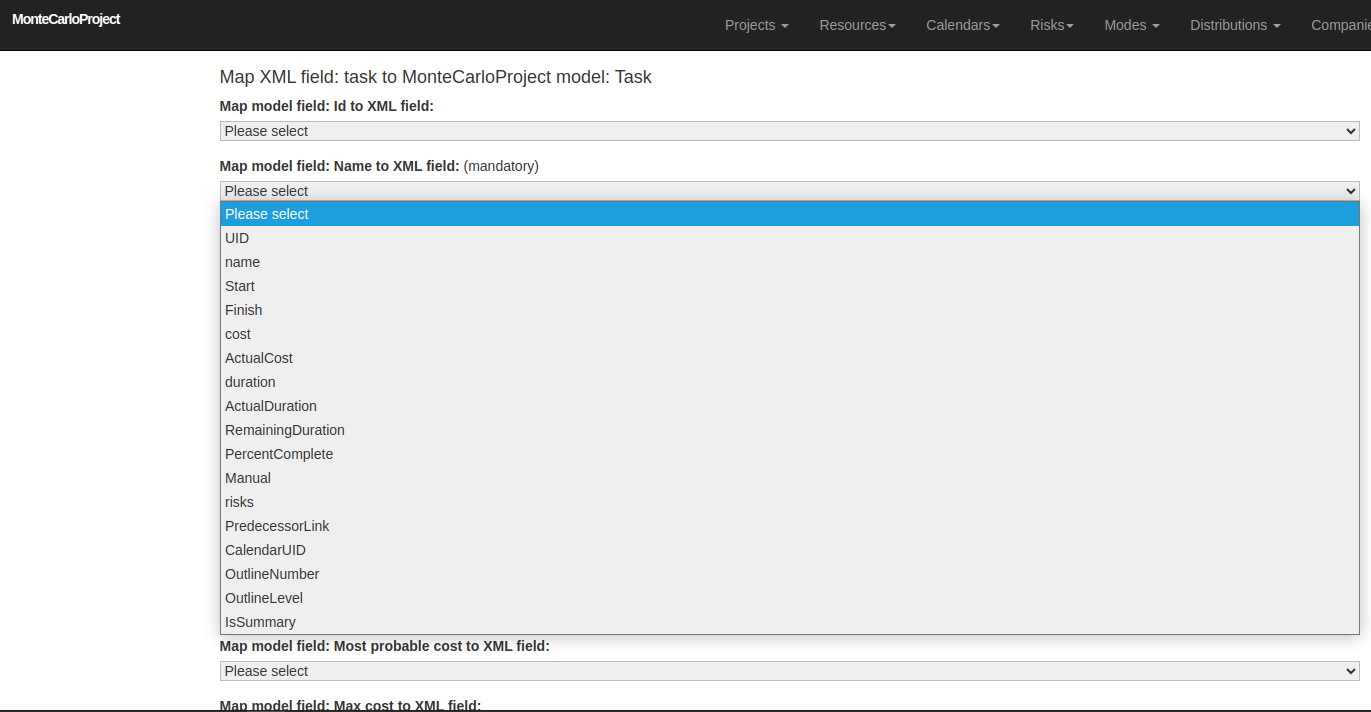
Picture 5. Attachment of the XML fields to the selected MonteCarloProject model fields (attributes).
The user view opens after clicking on the name of the user (figure 1). The project portfolio section on the left (highlighted in the figure) shows:
The Crystal plan is required to view the portfolio data.
The middle section shows:
The right hand section contains:

Figure 1. User view.
You can access the desired items by clicking on the links. The items on the user view are also displayed on the home view.
The home view that opens after logging in is divided into three sections (figure 1). The project portfolio section on the left (highlighted in the figure) shows:
The Crystal plan is required to view the portfolio data.
The middle section shows:
The right hand section contains:
Figure 1. Home view.
You can access the desired items by clicking on the links. The items on the home view are also displayed on the user view.
Note that risk management requires MonteCrystal plan.
You can assign risk to a project either in risk or project display.
Assign risk in risk display
Select 'Risks' from the 'Risks' main menu to open the risk list.

Choose the risk by clicking on the risk name.
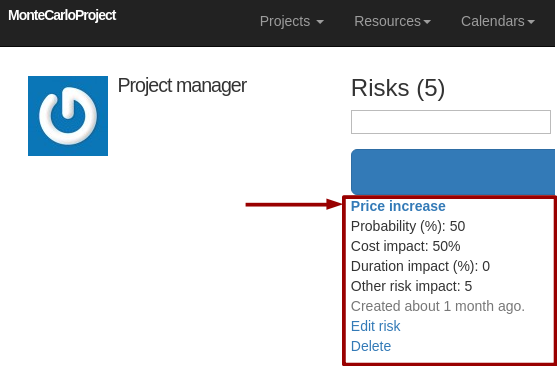
Choose the project in the right hand side of the risk display and click on the 'Set risk' button. Scroll down to see all projects if needed.
After the assignment the project moves under the assigned projects section in the top part of the display. To release the risk click on the 'Release risk' button. Note that risks can be released only from logged-in user's own projects.

Assign risk in project display
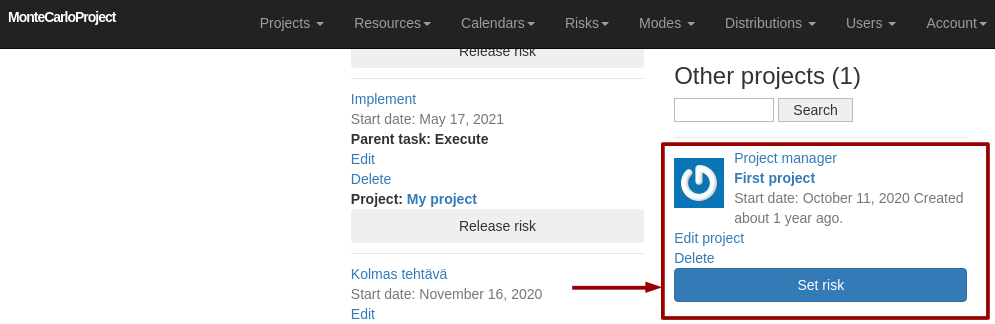
Open project list by selecting 'Projects' from the 'Projects' main menu. Select the project by clicking on its name.
Assigned and other risks are shown in the right hand side of the project display. To set the risk click on the 'Set risk' button.

After the assignment the risk moves under the assigned risks section. To release the risk click on the 'Release risk' button.
